
Microgreen Kit Instructions
Microgreens are the gateway to gardening and growing some of your groceries indoors through winter. You can grow microgreens year round, too! Grow little batches indoors each week, or twice a week, or every other week - however much you eat! Now that you have one of our kits, how do you bring fresh flavors to your winter meals?

Your kit includes:
tray(s) with holes
tray(s) without holes
Humidity dome(s)
Seed packet(s)
Potting soil (comes with only some of our kits)
Other tools you’ll need: spray bottle and scissors
Potting soil or seedling mix
Optional additional materials: seedling mat (to maintain consistent soil temperature to promote germination) and grow lights (if you don’t have a sunny window)
Locate a sunny window or set up grow lights about 4-6"” above the tops of your trays if you are aiming for more uniformity. Your microgreens will grow faster if they have more light. If you are using grow lights, though, make sure you give your plants at least a few hours of darkness each night to grow properly. If your space is unheated, consider using a heated seedling mat to provide consistently warm soil temperature to promote germination.
Fill your tray(s) (the one(s) with holes) with damp seedling mix (almost all the way full). Don’t push down on your soil. It should be fluffy for future plant roots to enjoy. Nest the soil filled tray(s) into your tray(s) without holes. If you have our multiple tray kits, consider planting half of your trays and then waiting 3-7 days to plant more to stagger your harvest, giving yourself a consistent supply of greens!
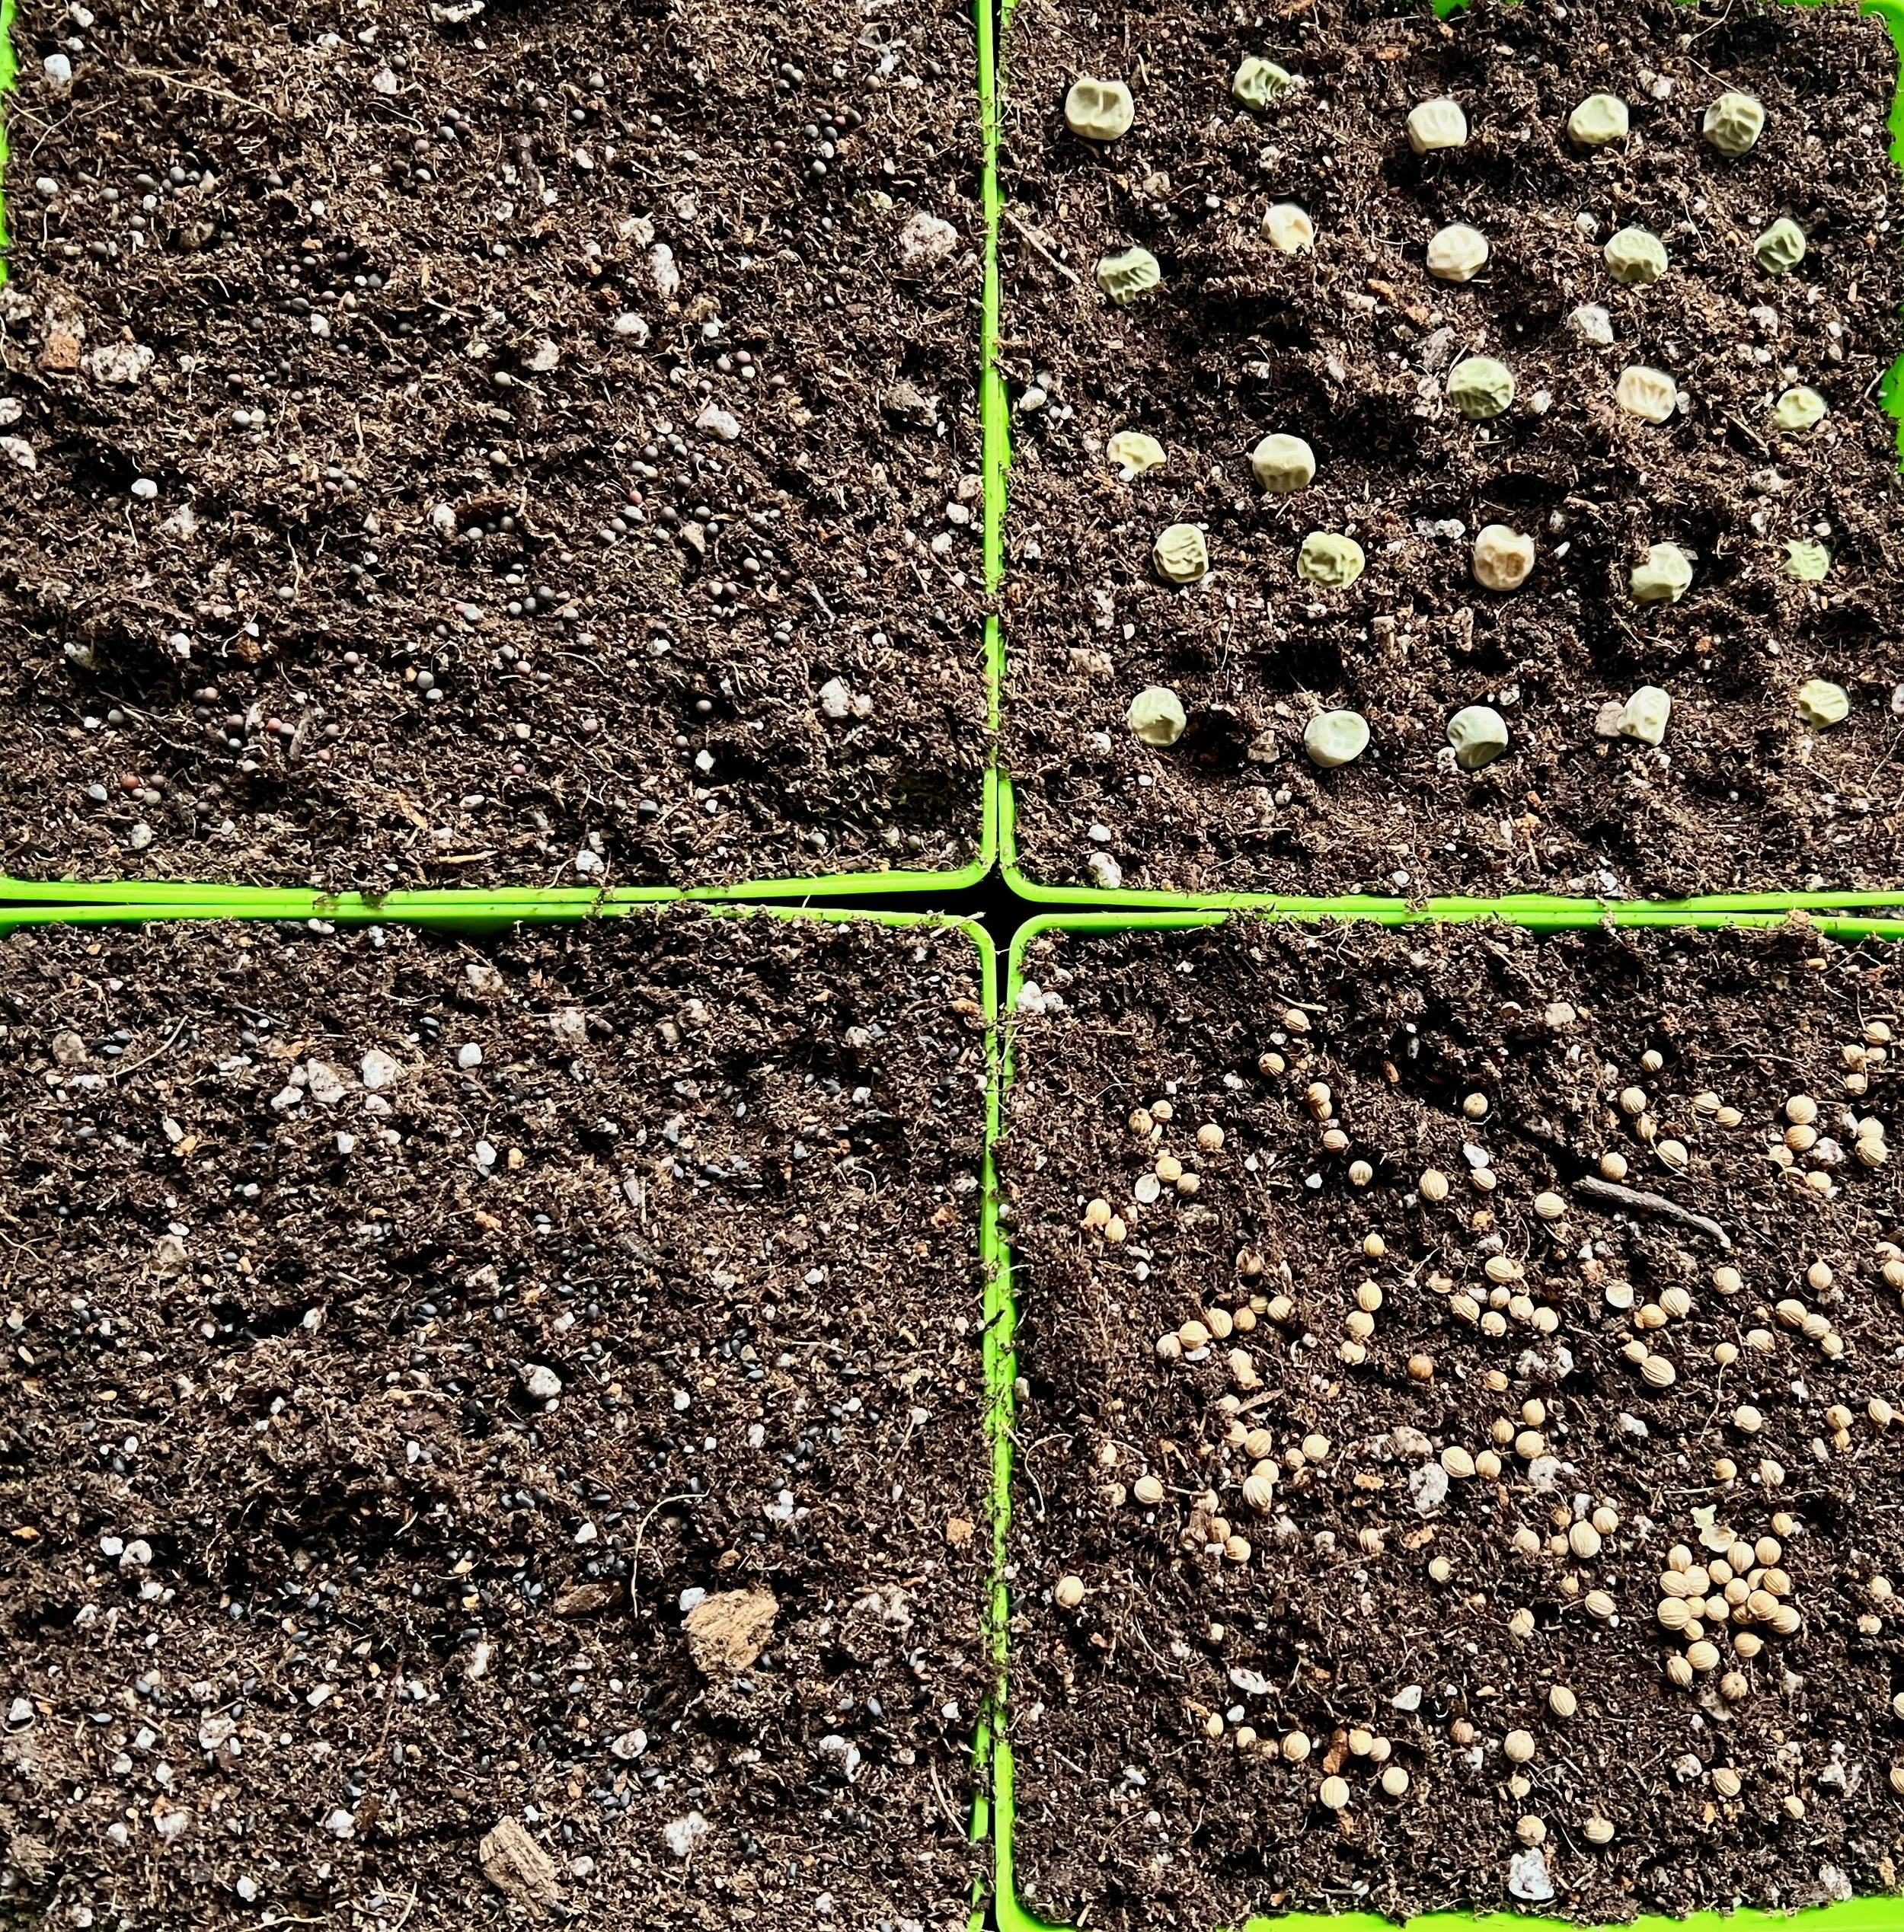
3. Evenly sprinkle the contents of approximately half of your seed packet(s) (as evenly as you can) on the surface of the soil. Seed density is important when growing microgreens. If you sow too few seeds, you’ll likely have spotty trays and waste precious growing space and time. Too many seeds will likely create crowded conditions, which could mean smaller plants and possible mold issues. Every growing space will be a little different depending on temperature and airflow, but each of our microgreen seed packets have been measured out to include enough seed for two sowings in small 5x5’ trays. A typical rule of thumb for smaller seed varieties is to distribute 10-12 seeds per square inch For larger seeds, sprinkle 6-8 seeds per square inch. You aren’t growing these plants to their full maturity, so you don’t need to space them out like you would if growing them outside in your garden.
4. Sprinkle soil on top of the seeds so that they are buried about twice the size of the seed deep.
5. Mist the top of your soil with a spray bottle, gently with the sprayer on your kitchen sink faucet, or, if in a greenhouse environment, use the mist setting on your hose nozzle. Water until the soil appears shiny. You want your soil to be evenly moist, but not completely saturated. Cover with your humidity dome(s) to promote germination, minimizing the need to water repeatedly everyday. Again, the top of your soil should be consistently moist, but not soaking wet, until your seeds sprout/germinate. Overly wet potting soil can rot seeds before they have the chance to sprout. Flash back to chia pets- if seeds are too close together they could mold, right? And seeds that dry out after being wet are far less likely to sprout, so the key is to find a nice balance of keeping the top of your soil consistently moist, but not too wet.
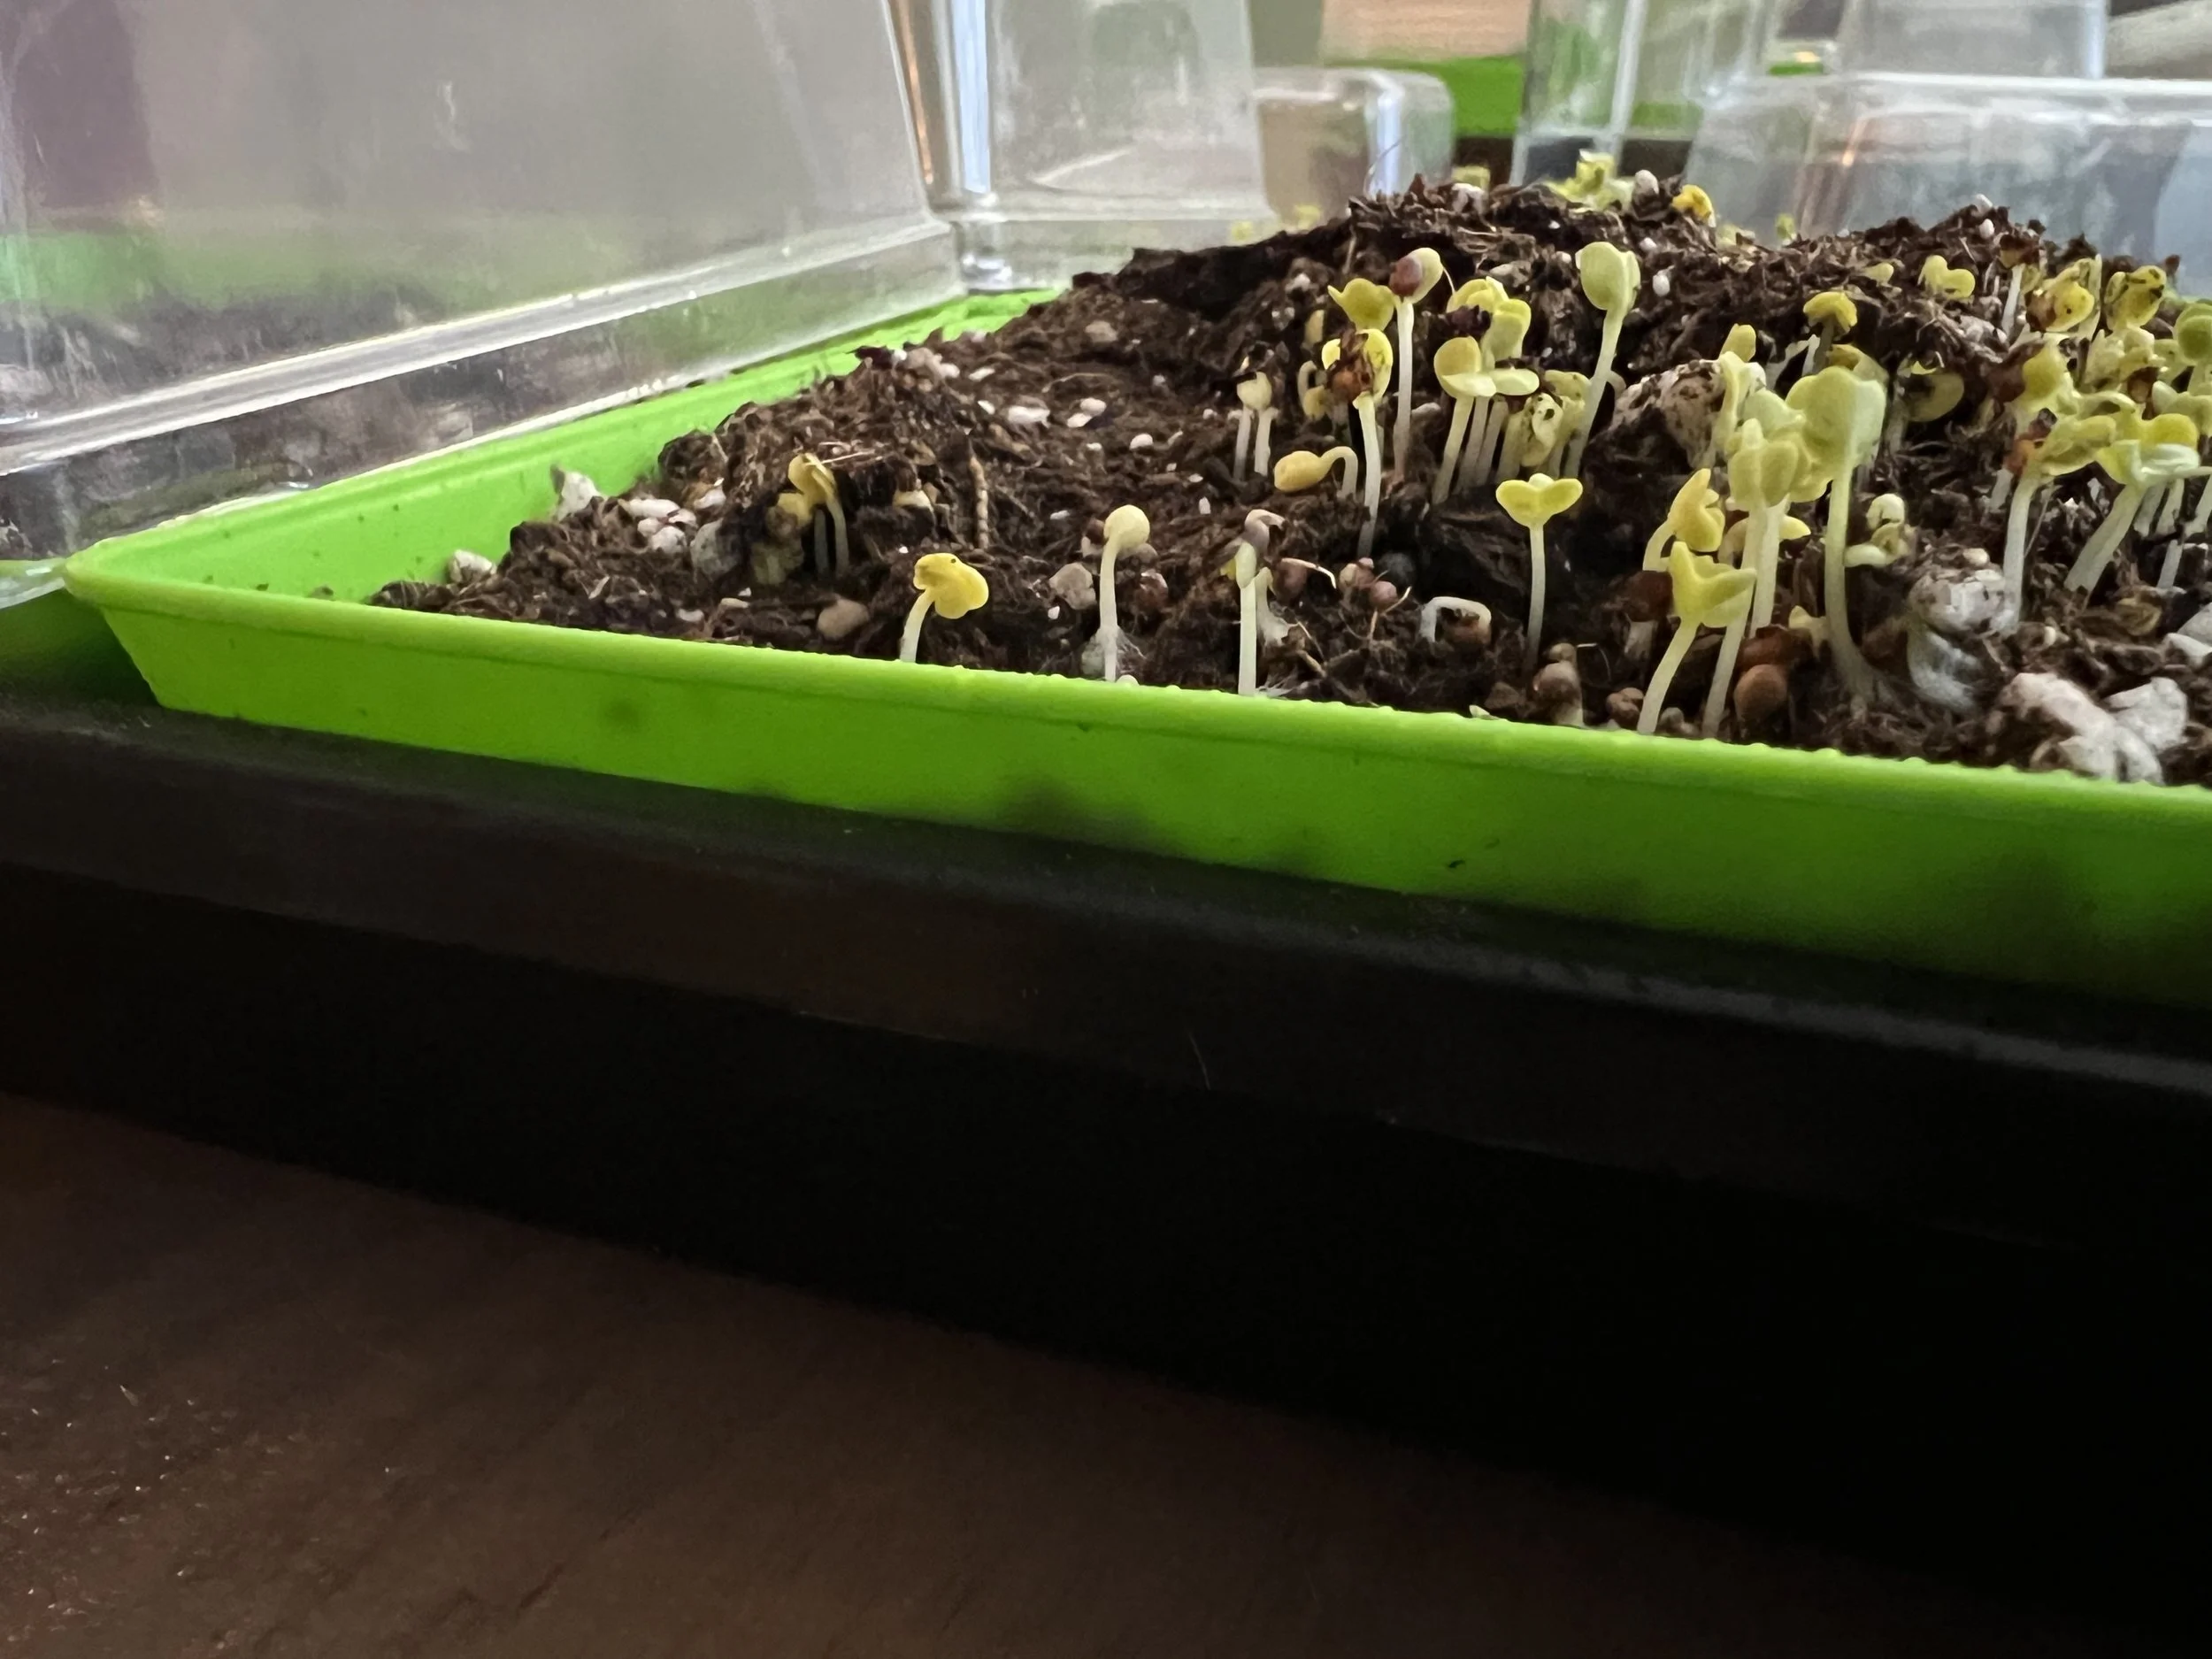
6. Once your seeds have germinated, remove your humidity dome(s) and begin bottom watering by filling your tray(s) without holes with water. Nest your soil filled tray back inside it. Roots will slurp up water through capillary action, or the soil’s tendency to absorb water vertically. This will prevent the thin stems of your tender sprouts from breaking from overhead watering and should keep your microgreens a bit cleaner. Feel free to rotate your trays at this point if you’re noticing that plant stems are leaning toward the light. It’s alright for microgreen plants to be leggy, though, and is totally normal in the winter time if you aren’t using grow lights.
Harvesting!
Once plants have their cotyledons (the first baby leaves to emerge), use kitchen scissors to cut them at the base of their stems (or higher) and gently rinse them before enjoying.
Most microgreens will germinate in 2-3 days and be ready to begin harvesting around 7-10 days from planting. For easy harvesting, the stems should be at least 1.5 - 2” tall.
Herbs typically take longer to sprout and their stems are shorter. Pea shoots should be harvested about 1” above the soil line or just above the bottom set of leaves. If left this way, they will often produce a second edible crop!


Freshly harvested microgreens will last 7-14 days in the fridge. If you are harvesting your microgreens all at once to store, save the washing until right before you eat them. Packaging freshly harvested microgreens while they are wet, or even just damp, will significantly reduce their shelf life. Placing a folded paper towel into the bottom of your storage container will help absorb excess moisture. Basil microgreens are the one exception to this rule. Harvest them right before enjoying!
You can eat microgreens if they get bigger than expected before you have time to harvest. Most microgreens will become what are often referred to as ‘baby greens’ once they grow past the first true leaf stage. Only a few microgreens, like sunflowers, undergo a dramatic flavor change (more sour) once they get to this stage. So, sunflower microgreens are best harvested right on time.


You may also choose to harvest just part of a tray at a time as needed. You can then leave the remainder of the plants in the tray growing until you are ready to harvest them for your next meal. This method works incredibly well if you want to have micro herbs available in the kitchen to finish off any dish with a great pop of flavor. Just keep in mind that partially harvested trays in your kitchen or growing space may attract pests like fungus gnats. Infestation is especially possible if your growing area does not have great airflow.
Dispose of the remaining roots and soil from you microgreen tray(s) by giving them to your red wigglers, adding them to your compost bin, or disposing of them in your yard debris bin, or tossing them into your outdoor landscape as mulch! Wash the trays with hot soapy water and allow to air dry. You can sterilize your trays for extra prevention against pests and diseases by dipping them in a mild bleach solution or giving them a quick misting with a 3% hydrogen peroxide solution (always use appropriate safety gear when dealing with chemicals, of course).

In the spring, once your outdoor soil temperature reaches at least 45 degrees, you can densely sow successions of leafy greens and thin them out and eat them as microgreens!
Feeling overwhelmed? Sign up for OSU Extension’s FREE Microgreens Grow Along Workshop, and get short daily tips and videos over a two week period to help you get started!
Need more seeds? We sell seed packets! If you’d like larger quantities, though, Check out our blog post on recommended seed companies or use up old seed you have already from past growing seasons! Afterall, microgreen seeds are just regular seeds sown in greater density than they normally would be sown if growing plants to maturity.
Try mild greens mixes, mustards, arugula, radishes, broccoli, and cauliflower. Brassicas make great microgreens! Cilantro and basil are also some of our favorites. Microgreen blends can be created by mixing seed varieties that grow at similar rates. You can use seed you didn’t love in your garden or varieties that didn’t do so great in your garden. Saved seeds from hybrid varieties who likely won’t have the same attributes as their parents can also make great microgreens!
Want additional kits or microgreen accessories? Check out our options!